In this article, we'll walk you through how to use Recuva to recover data on your computer.
Step 1: Download and Install Recuva
The first step is to download and install Recuva on your computer. Once the download is complete, run the installer and follow the instructions to install the program.
Step 2: Select the File Type and Location
After installing Recuva, launch the program and select the type of file you want to recover. You can choose from a variety of file types, including documents, pictures, music, videos, and compressed files. Next, select the location where the file was located before it was deleted. This could be a specific folder, your desktop, or your entire hard drive.
Step 3: Scan Your Computer
Once you've selected the file type and location, click the "Scan" button to start the scan process. Recuva will scan your computer for deleted files that match the criteria you selected in the previous step.
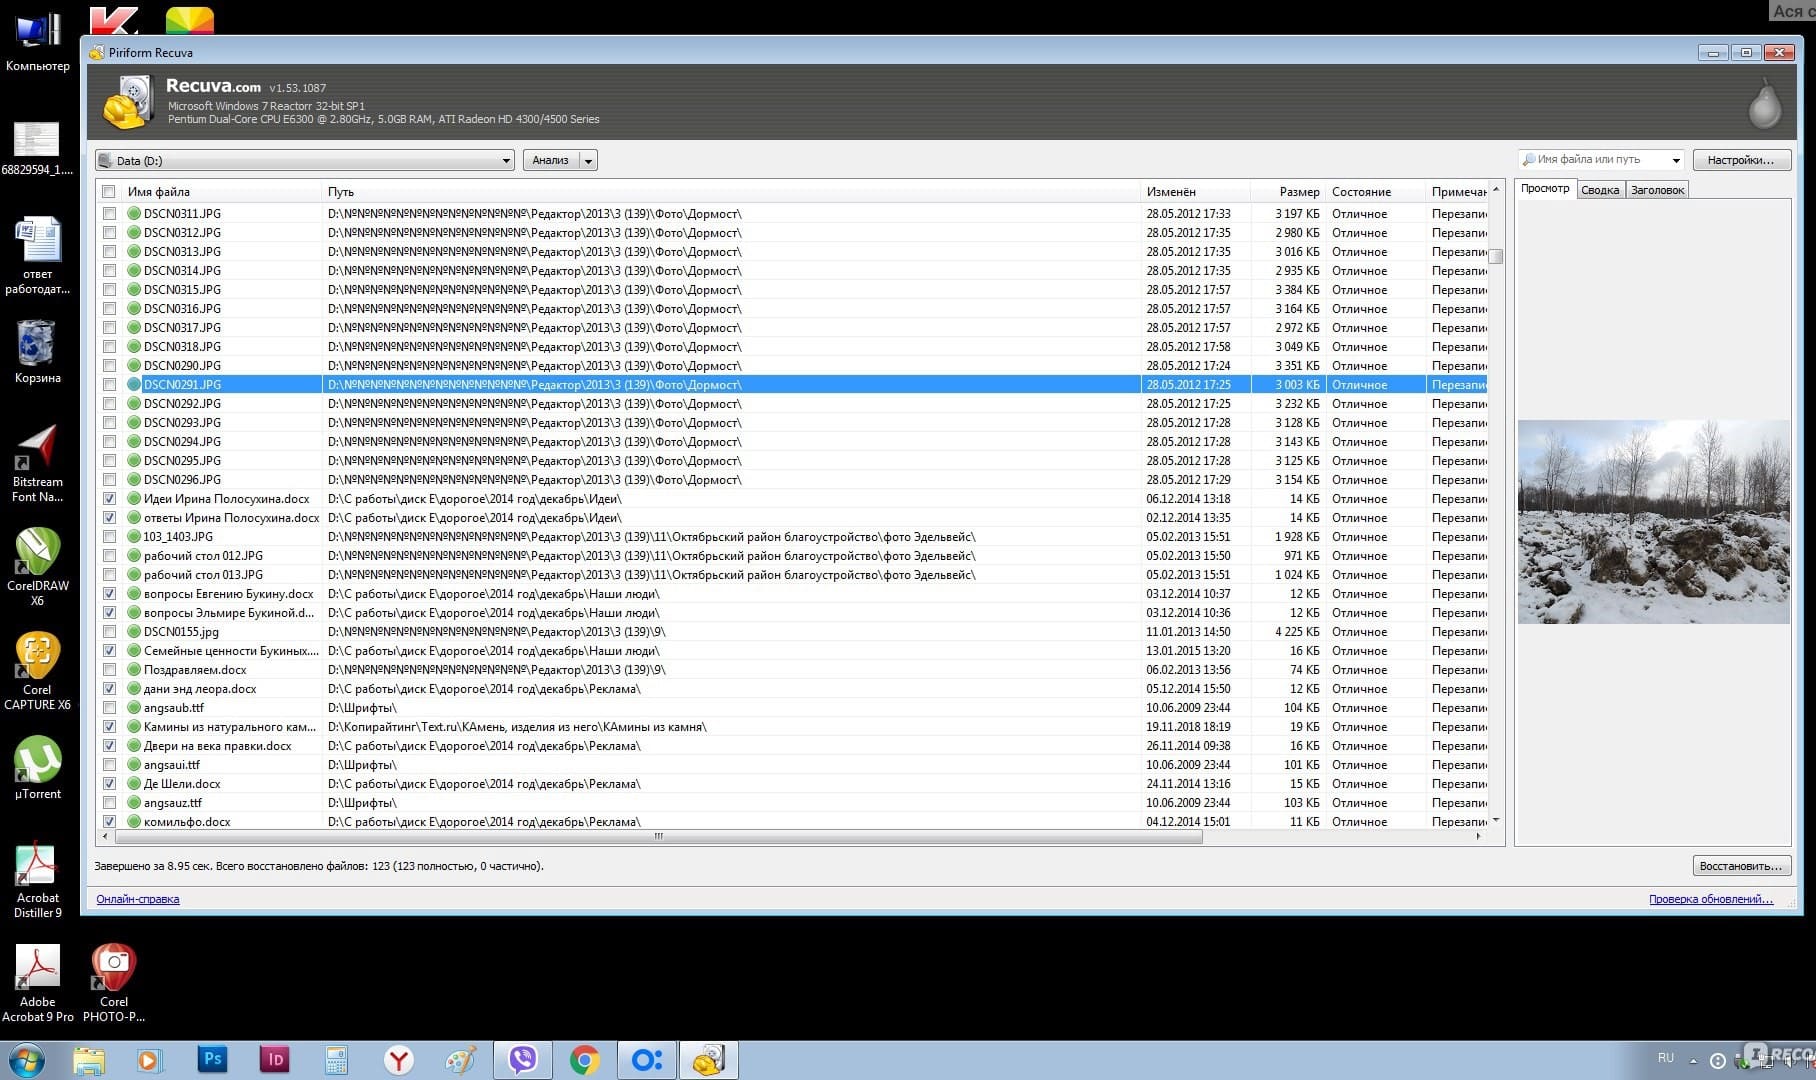
Step 4: Preview and Recover Your Files
Once the scan is complete, Recuva will display a list of all the deleted files that it was able to find. You can preview each file by selecting it and clicking the "Preview" button. This allows you to make sure that you are selecting the correct file before you recover it. To recover a file, select it and click the "Recover" button. Recuva will ask you where you want to save the recovered file, so choose a location and click "OK". Your file will be recovered and saved to the specified location.
Tips:
It's important to note that the longer you wait to recover a deleted file, the less likely it is that you will be able to recover it. This is because as you continue to use your computer, the space that was occupied by the deleted file may be overwritten with new data.
To increase your chances of recovering a deleted file, avoid downloading or saving new files to your computer until after the file has been recovered.