This guide describes the detailed procedure for recovering documents in DOC, DOCX, XLS, XLSX, and PDF formats using Recuva.
Before starting, it is necessary to understand how Recuva locates lost files. Deleting a file in Windows does not lead to the immediate physical destruction of the data. The operating system merely marks the area on the disk occupied by that file as free for overwriting, removing the reference to it from the master file table (MFT) in NTFS or the file allocation table in FAT32.
Recuva uses two main scanning modes: Quick Scan and Deep Scan. The Quick Scan analyzes the MFT and finds records of recently deleted files. The Deep Scan uses signature analysis, scanning the drive's contents sector by sector for characteristic byte sequences that correspond to the beginning (header) and end of a file. For Word documents, the signature is a specific byte sequence describing an OLE container (for older formats) or a ZIP archive with an XML structure (for DOCX/XLSX). PDF files are identified by the signature byte sequence %PDF at the beginning of the file.
A key success factor is immediately ceasing all activity on the logical partition where the lost data was located. Every write operation, including booting the system, updating the browser cache, or installing Recuva itself onto that same drive, can irreversibly overwrite sectors that the program will attempt to recover.
Configuring Scan Parameters for Office Documents
Recuva offers a wizard interface and an advanced mode. For targeted searches of Word, Excel, or PDF documents, the wizard is the fastest filtering method.
When launching the wizard, at the File Type selection step, you should choose the "Documents" category. This filter is configured by the developer to display only files with the following extensions: DOC, DOCX, XLS, XLSX, PPT, PPTX, ODT, ODS, PDF, ODC. Selecting this category excludes multimedia files and system junk from the scan results, focusing computational resources on the target formats.
At the File Location step, you need to specify the drive or specific folder where the file was located before its loss. Choosing the "In a specific location" option and manually specifying the exact path to the directory, for example D:\Projects\Reports, significantly narrows the analysis area. While this does not cancel a full disk scan, it filters the output results, making it easier to identify the desired file.
Activating and Applying the Deep Scan Function
If the Quick Scan does not find the file, you should activate the Deep Scan mechanism. This is especially relevant for PDF files and documents deleted after formatting the drive. The Deep Scan ignores the file system and accesses the drive's sectors directly.
You must check the "Enable Deep Scan" checkbox. In advanced mode, this option is enabled via the settings menu: the "Actions" tab, where you need to check "Scan for non-deleted files" and "Enable Deep Scan". You can also force the scan mode using the "Scan Mode" button on the interface panel.
This process can take from several tens of minutes to several hours, depending on the drive's capacity and speed. Recuva will scan sector by sector, looking for PDF, DOC, and XLS signatures. Files found this way often lose their original names and appear with technical names like [001].docx or file001.pdf because the name record in the MFT was lost.
Interpreting Results and Integrity Assessment Criteria
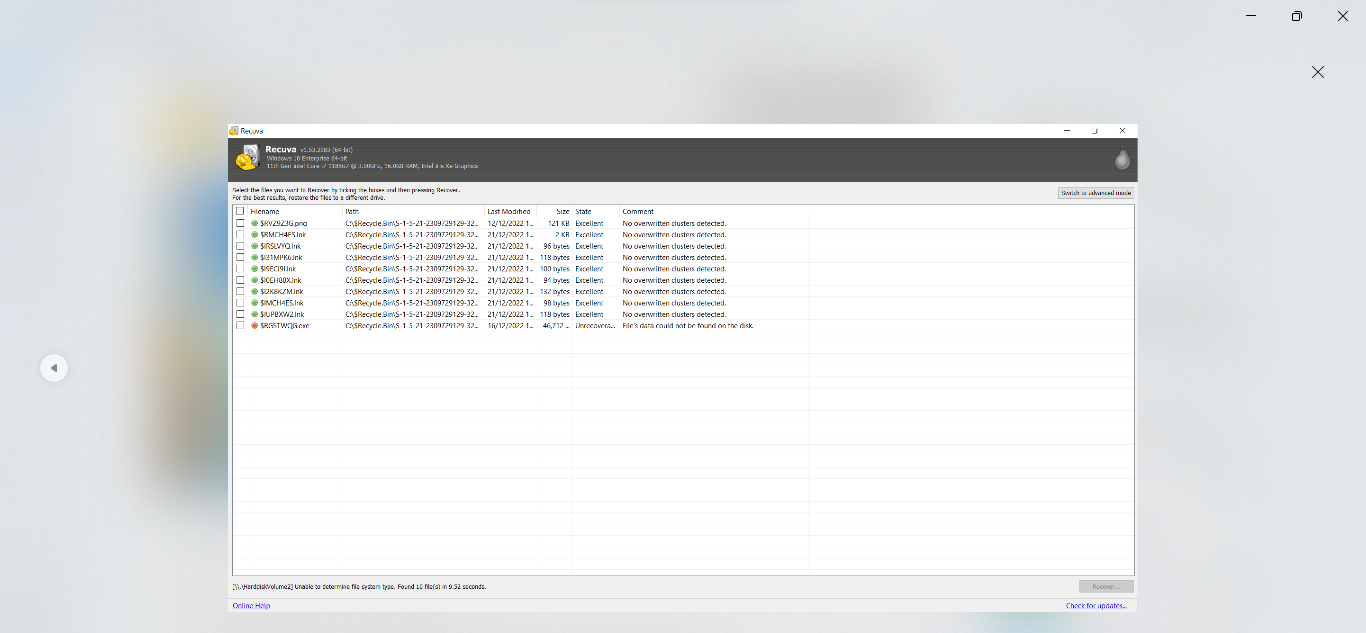
Once the scan is complete, Recuva displays a list of found objects. Each file is accompanied by a color status indicator:
Green marker: The file has not been overwritten, its clusters are intact, and the probability of successful recovery is close to 100%.
Yellow marker: Indicates partial overwriting or damage to some data sectors. The document may be recoverable, but its content may contain incorrect characters or fail to open in the target application.
Red marker: All clusters previously occupied by the file have been overwritten by other data. Recovery in its original form is impossible.
Pay attention to the "Path" column in the scan results. For files detected via deep signature analysis, the path may be listed as "unknown" or denoted by a question mark. To verify such files, use the built-in preview function in advanced mode; however, it may not always correctly display complex formatting elements of PDF or DOCX files.
Safe Recovery Procedure
The most critical stage regarding data safety is choosing the location for recovered files. The golden rule: never save recovered files to the same logical partition from which you are recovering.
When Recuva prompts for a save path (the "Browse For Folder" dialog), you must specify a folder located on a physically different drive. For example, if recovering data from drive D:, save it to an external USB drive, flash drive, or drive E:. Violating this principle may cause Recuva, during the saving process, to write data over the very free sectors where remnants of the recoverable files still reside, leading to their irreversible corruption.
After selecting files in the list and clicking the "Recover" button, the program will display a statistical report with the number of successfully extracted objects. If a Word or Excel file is corrupted, try using the built-in recovery tools in office suites (the "Open and Repair" function in Microsoft Word).
Actions in Case of Negative Results
If Recuva does not find any trace of a deleted PDF document, the reason may be as follows: the drive is a Solid-State Drive (SSD) with an active TRIM command, which zeroes out memory cells after a file is deleted. Research has shown that Recuva cannot recover data deleted from an SSD where the TRIM command has executed, as the physical cells are zeroed out at the hardware level. In this scenario, recovery via software methods is impossible.
Also, consider that antivirus software, indexing, or cloud synchronization might have overwritten the data before you even ran the utility. The only preventive measure for the future is regular backup of critically important documents and activating Volume Shadow Copy in Windows settings.